Q. I’m mostly interested in shooting landscapes and making prints from my photos. What are the best ISO, aperture and shutter speed settings for high-contrast light conditions?
A. There are two ways to answer this question. When people talk about photographing in high contrast, that usually means they’re shooting in the middle of the day — which generally is not recommended. That said, sometimes you aren’t able to spend an entire day at the place you want to photograph, so the middle of the day might be the only time you can be there. Let’s assume for now that that’s the situation you’re in.
Over time, digital cameras have gotten much more sophisticated and able to capture the spectrum of highlights to shadows in these situations. When it comes to camera settings, all manufacturers have a built-in “sweet spot,” or native setting, for the ISO. This varies from camera to camera, but if you use that setting (or stay very close to it), your camera will be best equipped to capture the greatest dynamic range possible. Generally speaking, lenses are sharpest one or two f-stops down from their maximum aperture. Do some test shots at different focal lengths and apertures, then take a good, hard look at the results. Because you’re shooting landscapes, don’t worry too much about shutter speed — but because you want to make prints, be sure to use a tripod and shoot in RAW format. It might seem like a lot to remember, but doing these things will make a noticeable difference.
Here are some things you might try doing when you’re not able to shoot in the “golden light” of sunrise and sunset:
- Instead of grand vistas, look to shoot intimate details of your surroundings, such as patterns and abstracts. During midday light, shadows, which define shape in photos, are projected straight down, so photos of big scenes appear flat and dull. Looking for vignettes allows you to use what nature gives you to make the best of your situation.
- Use the high contrast of shadows and highlights to your best advantage. Don’t try to compensate for a less-than-ideal situation; instead, celebrate the elements you’re working with. In other words, make this a style.
- Now that you’re thinking about the first two tips, add color to the mix — the brighter, the better. Color combined with high contrast can add graphic interest to your work.
- Don’t shoot with the sun at your back. Even on the harshest days of summer, you’ll get hints of shadowing in the landscape. Use side light and backlight to define form and shape. Doing this will create the illusion of depth in your images.
Now, here’s the second part of my answer:
Assuming you can do so, I think you’ll be much happier with your photos if you work very early and very late in the day. At those times, our planet’s atmosphere acts as a natural diffuser and reduces contrast, and shadows are longer, creating a better sense of depth and dimension — which makes photographs more interesting and involving.
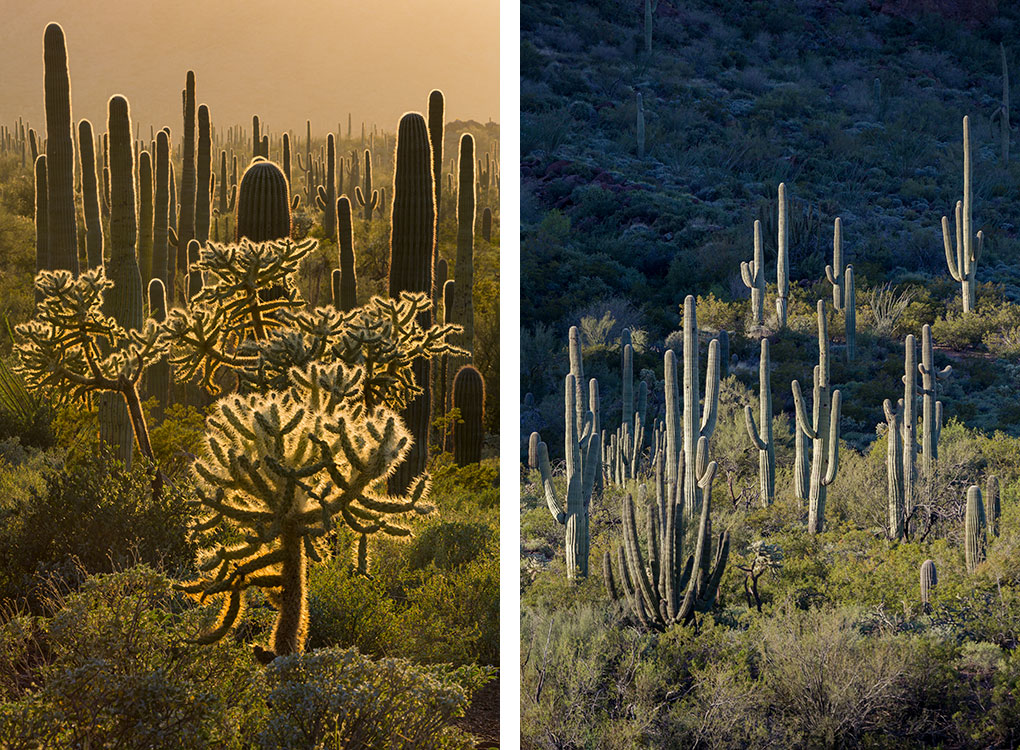
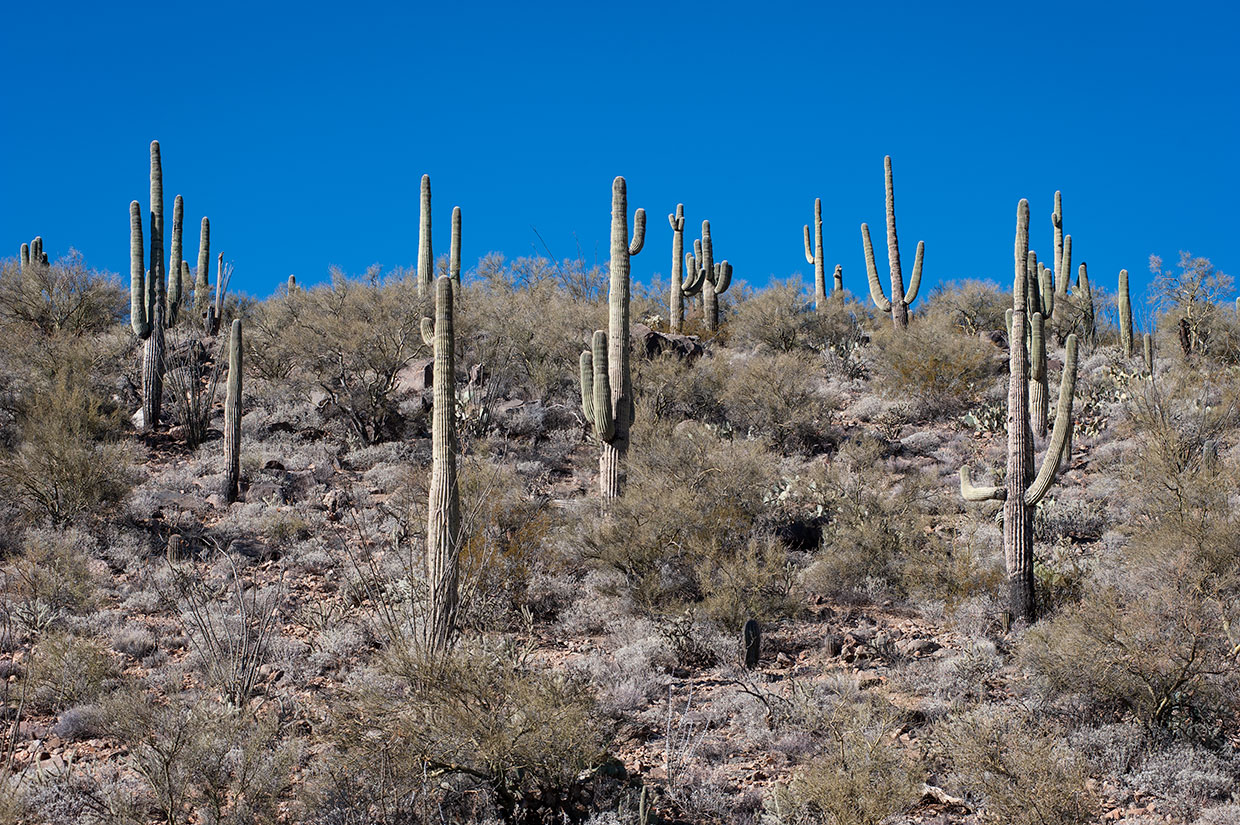
Take a look at these photos of desert landscapes. In midday light (top), the shadows on the cactuses all but disappear, and everything looks dull and unimpressive. But if you photograph early or late, you can make a backlight shot (above, left), which brings out texture, such as in the cactuses’ spines, and adds dimension to the photo. Or you can use side light (above, right), which creates dimension as well but also separates the cactuses from the background.
As I said, it’s not always possible to make photos during the “magic hour,” so these tips should give you the ability to create nice images no matter what the light conditions are.
If you have a question about photography, send us an email ([email protected] ) and we’ll try to answer it in a future issue.